第8步 Excel导出
1. 在项目中添加POI依赖
首先,你需要在 pom.xml 文件中添加 Apache POI 的依赖。这是实现导出 Excel 的核心库。你的文件里已经展示了如何进行添加:
<dependency>
    <groupId>org.apache.poi</groupId>
    <artifactId>poi-ooxml</artifactId>
    <version>4.0.1</version>
</dependency>
2. 创建导出方法
在你的控制器类中(如 SysUserController),添加一个方法来处理用户数据并导出为 Excel 格式。该方法大致如下:
@PostMapping(value = "/exportExcelUser")
    public void exportExcelUser(HttpServletResponse res) {
        // 使用 User 类而非 SysUser
        List<User> records = userService.list(); // 获取所有用户数据
        Workbook workbook = new XSSFWorkbook(); // 创建一个新的 Excel 工作簿
        Sheet sheet = workbook.createSheet(); // 创建一个新的工作表
        Row row0 = sheet.createRow(0); // 创建表头

        // 创建表头
        int columnIndex = 0;
        row0.createCell(columnIndex).setCellValue("No");
        row0.createCell(++columnIndex).setCellValue("ID");
        row0.createCell(++columnIndex).setCellValue("昵称");
        row0.createCell(++columnIndex).setCellValue("年龄");
        row0.createCell(++columnIndex).setCellValue("邮箱");
//        row0.createCell(++columnIndex).setCellValue("手机号");

        // 填充数据
        for (int i = 0; i < records.size(); i++) {
            User user = records.get(i); // 使用 User 对象
            Row row = sheet.createRow(i + 1); // 创建每一行数据
            columnIndex = 0;
            row.createCell(columnIndex).setCellValue(i + 1); // 设置序号
            row.createCell(++columnIndex).setCellValue(user.getId());
            row.createCell(++columnIndex).setCellValue(user.getName());
            row.createCell(++columnIndex).setCellValue(user.getAge());
            row.createCell(++columnIndex).setCellValue(user.getEmail());
//            row.createCell(++columnIndex).setCellValue(user.getPhone());
        }

        // 创建文件并下载
        File file = PoiUtils.createExcelFile(workbook, "download_user");
        FileUtils.downloadFile(res, file, file.getName());
    }
3. 工具类(如 PoiUtils, FileUtils)
你需要一些工具类来处理 Excel 文件的创建和下载。比如:
PoiUtils(处理 Excel 文件的创建)
public class PoiUtils {
    public static File createExcelFile(Workbook workbook, String fileName) {
        OutputStream stream = null;
        File file = null;
        try {
            file = File.createTempFile(fileName, ".xlsx"); // 创建临时 Excel 文件
            stream = new FileOutputStream(file.getAbsoluteFile());
            workbook.write(stream); // 将数据写入文件
        } catch (IOException e) {
            e.printStackTrace();
        } finally {
            IOUtils.closeQuietly(workbook);
            IOUtils.closeQuietly(stream);
        }
        return file;
    }
}
FileUtils(处理文件下载)
public class FileUtils {
    public static void downloadFile(HttpServletResponse response, File file, String newFileName) {
        try {
            response.setHeader("Content-Disposition", "attachment; filename=" + new String(newFileName.getBytes("ISO-8859-1"), "UTF-8"));
            BufferedOutputStream bos = new BufferedOutputStream(response.getOutputStream());
            InputStream is = new FileInputStream(file.getAbsolutePath());
            BufferedInputStream bis = new BufferedInputStream(is);
            int length;
            byte[] temp = new byte[1024 * 10];
            while ((length = bis.read(temp)) != -1) {
                bos.write(temp, 0, length);
            }
            bos.flush();
            bis.close();
            bos.close();
            is.close();
        } catch (IOException e) {
            e.printStackTrace();
        }
    }
}
4. 测试与调试
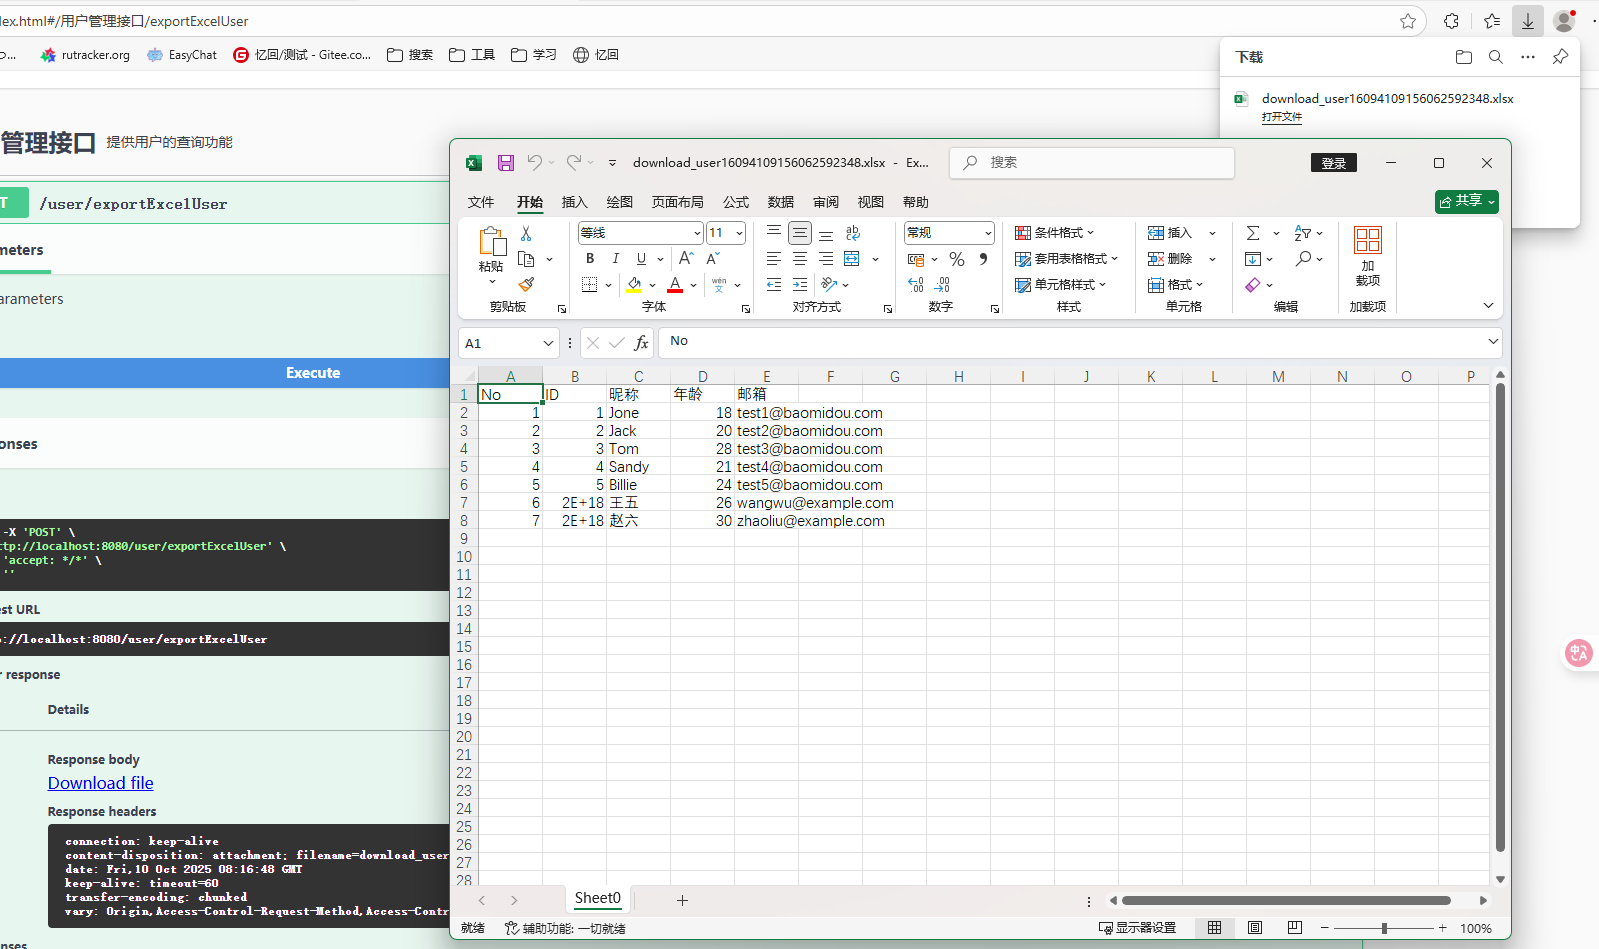
你可以通过 Swagger 或者 Postman 测试该接口,确保能够成功下载 Excel 文件。Swagger 提供了一个简单的 UI 用于测试接口,你可以通过以下地址来访问:
http://localhost:8080/swagger-ui.html
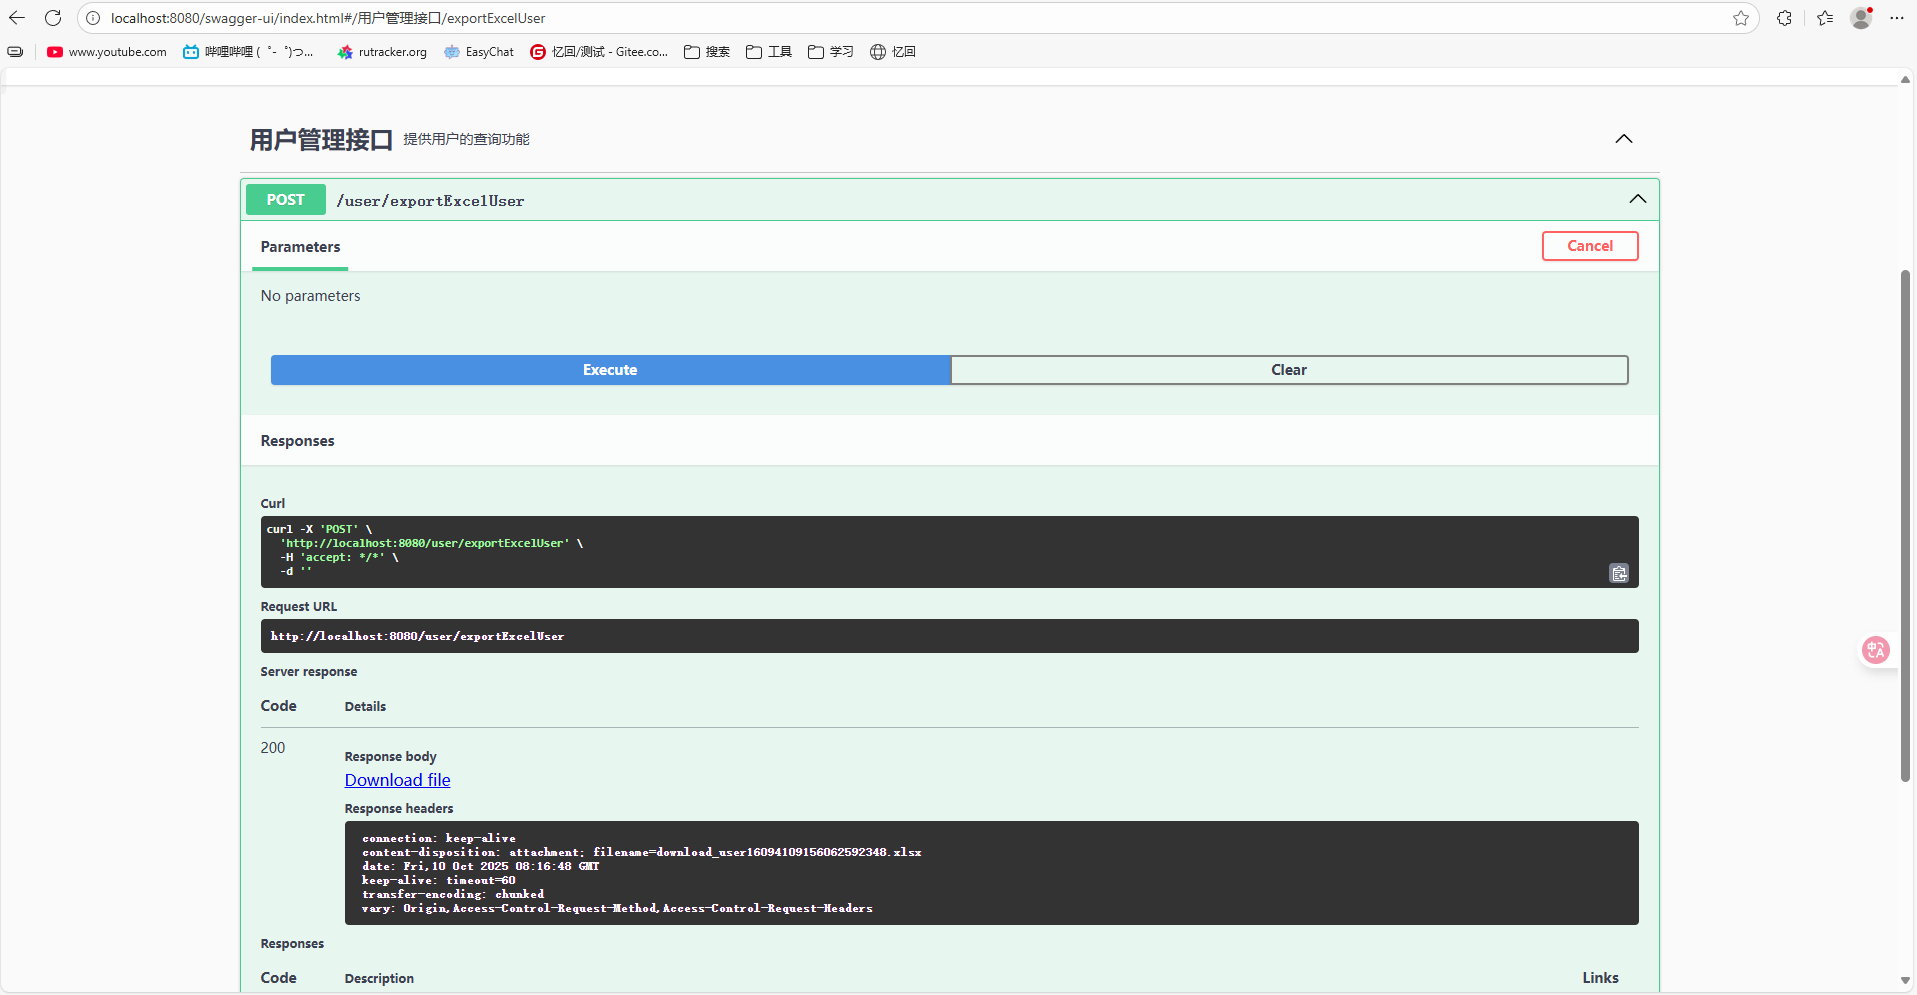
在 Swagger UI 中,你应该能找到 POST /user/exportExcelUser 这个接口,点击执行后可以下载包含所有用户数据的 Excel 文件。